.png)
How to Tile Bathroom Walls: A UK DIY Guide
- Dan Hall
- Aug 9, 2025
- 18 min read

Thinking about learning how to tile bathroom walls yourself? It's a brilliant way to put your own stamp on your home and add real value. The whole process of tiling bathroom walls boils down to a few key stages: getting the right kit, prepping your walls like a pro, planning your layout, and then the satisfying work of setting, grouting, and finishing the tiles.
With the right gear and a bit of patience, even a complete beginner can achieve a finish that looks like it was done by a seasoned tiler. This guide will walk you through exactly how to tile bathroom walls for a flawless result.
Your Essential Tiling Toolkit and Materials
A top-notch tiling job is less about raw effort and more about having the right tools and materials ready to go. A beautiful, long lasting finish is always built on a solid foundation. Trying to save a few quid by skipping the essentials is a classic false economy it almost always ends in frustration and a job you're not proud of.
So, before you even think about cracking open a bag of adhesive, let's run through what you'll need for tiling bathroom walls.
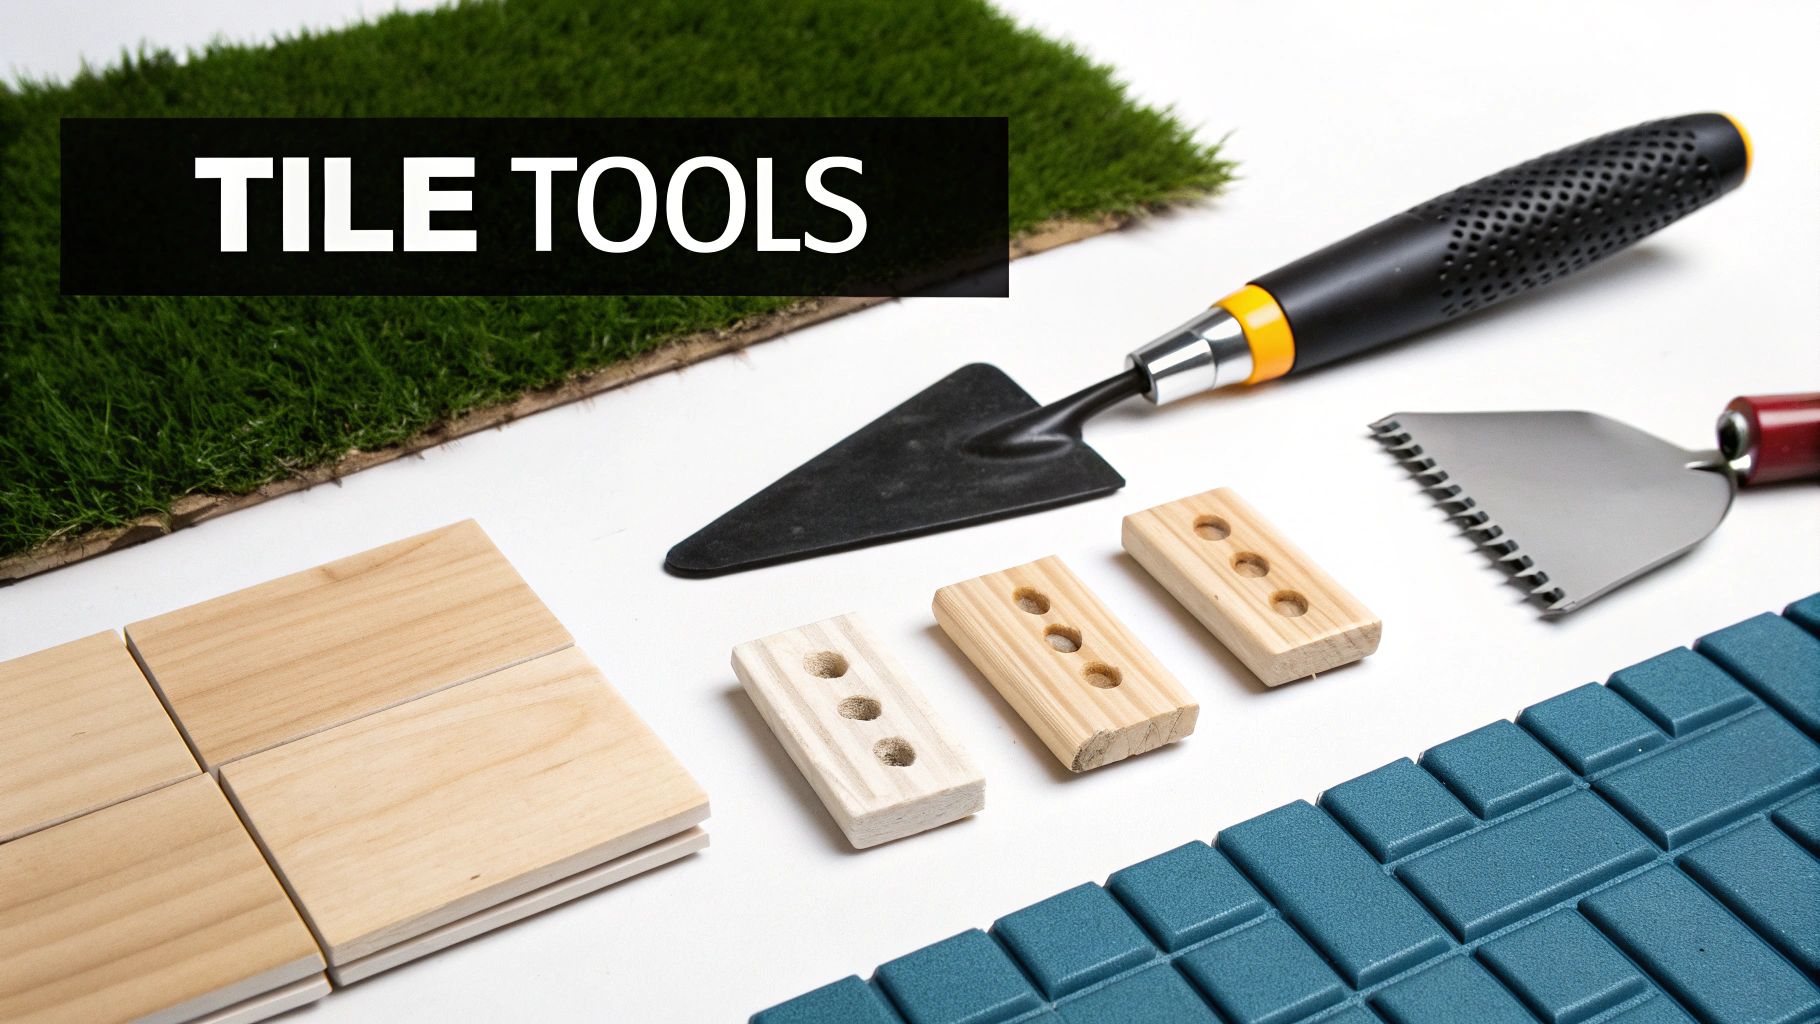
Assembling Your Core Tiling Tools
Think of these tools as an extension of your own hands. The right ones make every step of how to tile bathroom walls smoother, quicker, and far more accurate. Some are obvious, but others are the secret weapons that separate an amateur job from a professional one.
Here’s what every good tiling kit should have:
Tape Measure & Pencil: For getting your measurements spot-on and marking up cuts.
Spirit Level: This is non-negotiable. A long level, at least 1200mm, is your best friend for making sure every row of tiles is perfectly straight.
Notched Trowel: This isn't a one size fits-all tool. The size of the notches needs to match the size of your tiles. Small notches for small tiles, and bigger notches for those large-format ones. Get this wrong, and you'll get poor adhesion or find your tiles sliding down the wall.
Tile Spacers: For creating those crisp, uniform grout lines. Don't just try to eyeball it; consistency is what gives the final job its polished look.
Grout Float: A specific rubber float designed to push grout right into the joints without scratching the face of your tiles.
Sponges & Buckets: You'll want at least two. One for mixing your adhesive and grout, and a separate one with clean water for wiping away the excess.
Tile Cutter or Wet Saw: For simple straight cuts on ceramic tiles, a basic score-and-snap cutter will do the trick. But if you're working with tough porcelain, natural stone, or need to make tricky L shaped cuts, a wet saw is an investment you won't regret.
Choosing Your Tiles and Materials
The tiles you pick will define the whole feel of your bathroom. Choices like ceramic, porcelain, and natural stone are all popular, but they behave differently. Ceramic is usually budget-friendly and a doddle to cut, which makes it a great starting point for first-timers learning how to tile bathroom walls. Porcelain is much denser and more water resistant perfect for inside a shower but it's a tougher material to cut cleanly.
A classic rookie mistake is ordering the exact square meterage of tiles you need. Always, always add 10% extra to your final number. This gives you a buffer for mis cuts, accidental breakages, or those fiddly corner pieces you'll inevitably have to shape. There's nothing worse than running out mid project, as batches can vary slightly in colour and finish.
Your shopping list doesn't end with tiles. You'll also need adhesive and grout. For a UK bathroom, with all its moisture and steam, a waterproof powdered adhesive is the industry standard. Ready mixed tubs can seem convenient for a small splashback, but I'd never recommend them for tiling a full shower enclosure. The packaging will give you a good idea of coverage so you can buy the right amount.
The tile market is always changing, with trends and supply affecting what's available. For anyone learning how to tile bathroom walls, this means you have a huge range of choices, where price often reflects technical quality and design as much as anything else. In fact, projections show the ceramic tile market in the UK is set for major growth. If you're planning a full overhaul, getting a feel for professional bathroom and kitchen services can give you some valuable perspective on the scope of your own project.
Here's a quick checklist to help you gather all the essential materials for the job.
Essential Tiling Materials Checklist
This table breaks down the core materials you'll need for tiling bathroom walls. Getting these right from the start is half the battle won.
Material | Key Consideration | Pro Tip |
|---|---|---|
Tiles | Material type (ceramic, porcelain), size, and finish. | Always buy 10-15% extra to account for cuts and breakages. Check all boxes are from the same batch number for colour consistency. |
Tile Adhesive | Powdered, waterproof adhesive is best for bathrooms. | Check the adhesive is suitable for your tile type and the wall surface (e.g., plasterboard vs. tile backer board). |
Grout | Choose a mould-resistant and waterproof formula. Colour choice can dramatically change the final look. | For high-moisture areas like showers, an epoxy grout offers superior durability and stain resistance, though it's trickier to apply. |
Silicone Sealant | Must be a sanitary, anti-mould silicone for sealing corners and junctions. | Match the silicone colour to your grout for a seamless, professional finish. Use masking tape for perfectly straight sealant lines. |
Tile Primer/Sealer | Use a primer on porous surfaces like new plaster to stop the water from being sucked out of the adhesive too quickly. | If you're using porous natural stone tiles (like travertine or marble), they will need sealing before and after grouting to prevent stains. |
With these materials in hand, you've laid the groundwork for a successful project. Next, it's time to get those walls ready.
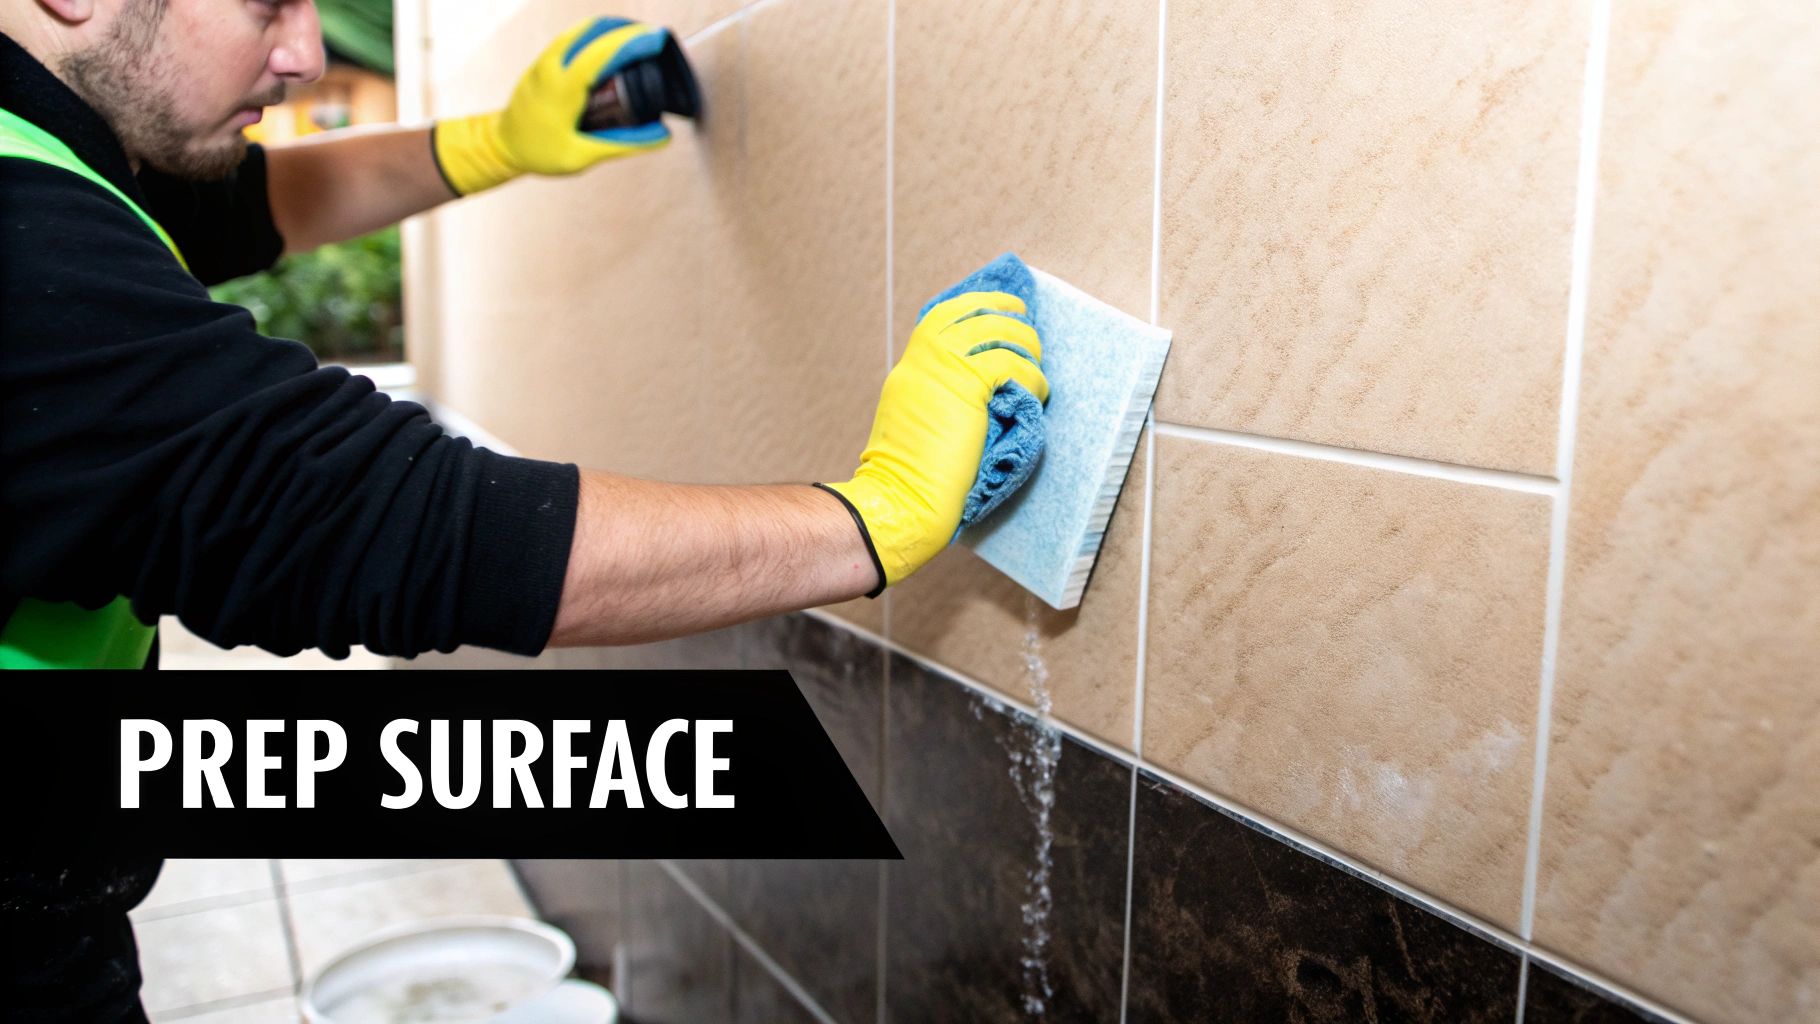
Preparing Your Walls for a Flawless Finish
The real secret to a professional tiling job isn't the fancy tiles you choose; it's the prep work you put in before a single tile touches the wall. I’ve seen it countless times: rushing this stage is a one-way ticket to problems down the line, from loose tiles and wonky grout lines to the nightmare of moisture damage.
Getting your bathroom walls perfectly ready is the foundation of the entire project. Before you even think about how to tile bathroom walls, you need to master the art of creating the perfect canvas. That means making sure your surface is clean, completely flat, and properly sealed against the damp, humid environment of a bathroom.
Assess and Clean Your Existing Walls
First things first, you need to know what you’re working with. Run your hand over the surface and use a long spirit level to check for any dips or bumps. Even a few millimetres of difference can throw off your whole layout and make for a frustrating job.
Different walls need different TLC:
Existing Tiles: You might be able to tile over old tiles, but only if they are absolutely solid and level. You’ll need to give them a serious clean to get rid of any soap scum, then scuff them up with sandpaper to give the new adhesive something to grip onto. If any are loose or cracked, they have to come off no exceptions.
Bare Plasterboard: A very common surface in UK homes. Make sure all the joints are properly taped, filled, and sanded smooth. Remember, the paper face of plasterboard is your enemy when it comes to moisture.
Painted Plaster: Paint can act as a barrier, stopping adhesive from bonding properly. Gloss or silk paints are the worst offenders and must be sanded thoroughly to create a "key." Any flaking paint needs to be scraped back completely.
Once you've done your assessment, give the wall a good clean with a sugar soap solution to get rid of any grease or grime. Let it dry completely before you do anything else.
Achieving a Perfectly Flat Surface
Let’s be honest, most walls aren't perfect. Small cracks or holes are an easy fix with a bit of multi-purpose filler. Just apply it with a filling knife, let it dry, and sand it back until it’s flush with the wall. Simple.
But what if your walls are more 'characterful'? If they're significantly out of true, getting a professional to apply a skim of plaster can save you a world of pain and guarantee a top-tier finish. If you’re not sure, getting a plastering quotation will give you a clear idea of what’s involved. It might just be the best money you spend on the project.
When dealing with freshly plastered walls, patience is everything. New plaster must dry out completely. This can take weeks, depending on the thickness and humidity. Tiling onto damp plaster is a disaster waiting to happen; it traps moisture, leading to adhesive failure and damp problems.
The Non-Negotiable Step: Waterproofing (Tanking)
This is the one step you absolutely cannot skip, especially in wet zones. Waterproofing, or "tanking," is probably the most crucial part of preparing a bathroom for tiling. I've seen the serious structural damage that happens when this step is ignored, and it's far more expensive to fix than a simple tanking kit.
Water will always find a way through grout, which is porous. Tanking creates an impenetrable barrier, protecting your wall structure like plasterboard or timber studs from rot and mould.
You must waterproof these key areas:
Shower Enclosures: Tank all walls inside the shower area, from the tray right up to above the showerhead.
Around the Bath: The walls surrounding a bath, especially one with a shower attachment, are another critical wet zone.
Splashbacks: While not as critical as a shower, it’s still good practice to tank the wall behind a basin.
Tanking kits are straightforward. They usually come with a primer, a thick liquid membrane you paint on, and waterproof tape for all the corners and joints. You just prime the wall, stick the tape in the corners, and then roll on two coats of the membrane. It's a small amount of effort for complete peace of mind.
Planning Your Layout and Tile Pattern
A thoughtful layout is what separates a decent DIY job from a truly stunning, professional-looking feature wall. It's a stage people often rush, but believe me, a bit of careful planning right now will completely transform your project. It's the secret to getting that symmetrical, balanced finish and avoiding those awkward, thin slivers of tile at the edges.
This is where you decide exactly how your tiles will sit on the wall, a crucial decision when you're learning how to tile bathroom walls. The goal is to make the finished wall look intentional and polished. Think about where your eyes will naturally fall and where any cut tiles will be least noticeable. This planning phase is your roadmap to a flawless finish, helping you minimise waste and prevent a wonky outcome.
Finding Your Centre and Setting the Starting Line
First things first, you need to find the true centre of the wall you're tiling. Grab your tape measure to find the horizontal midpoint and mark it lightly with a pencil. From that mark, use a long spirit level to draw a perfectly vertical line from top to bottom. This becomes your central reference point.
Next, you need to set a perfectly level horizontal starting line. Never, ever trust that your floor, skirting board, or bath is level they rarely are. Instead, you'll create your own starting point by temporarily fixing a timber batten to the wall. This guarantees your first row of tiles is dead straight, which means every row above it will be too.
A classic rookie mistake is to start tiling directly from the floor or the edge of the bath. If that surface isn't perfectly level (and it probably isn't), every single row of tiles will be slightly skewed. You'll end up with a noticeable diagonal drift across the wall that's impossible to fix later.
To set your batten, place one of your tiles against the vertical centre line, just above the bath or floor, leaving a small gap for the sealant you'll add later. Mark the wall at the top of this tile. Now, use your spirit level to extend this mark into a horizontal line right across the wall. Fix your timber batten along this line, checking it's perfectly level. This batten is what will support your first row of tiles while the adhesive cures.
The Power of the Dry Lay
Before you even think about mixing any adhesive, you need to do a 'dry lay'. This just means laying out a full row of tiles on the floor against a straight edge, using your tile spacers to mimic the grout lines. It's a simple step, but it’s incredibly revealing.
A dry lay lets you:
Visualise the final pattern and spacing.
See exactly how your tiles will finish at the corners of the wall.
Plan your cuts to ensure you have decent, balanced pieces at both ends, not an ugly thin strip on one side.
If your dry lay shows you'll end up with a sliver of a tile at one end, you can simply adjust your vertical centre line. Shifting it by half a tile's width often solves the problem. It means you'll start with a cut tile at the centre line, but you'll finish with two larger, equal-sized cut tiles at each end—a far more deliberate and professional look.
Choosing Your Tile Pattern
The pattern you choose has a massive impact on the final look and feel of your bathroom. It’s more than just an aesthetic choice; it can actually make the room feel larger, taller, or more dynamic.
Here are a few popular options to consider when you're deciding how to tile bathroom walls:
Pattern | Description | Best For |
|---|---|---|
Grid (Stack Bond) | Tiles are aligned in a simple, clean grid. | A modern, minimalist look. It's straightforward and really effective with square tiles. |
Brick Bond (Offset) | Each row is offset by half a tile's width, like a classic brick wall. | A timeless choice that's brilliant for hiding imperfections on slightly uneven walls. |
Herringbone | Rectangular tiles are laid in a distinctive 'V' shape. | Making a bold design statement. It adds a sense of movement and luxury, especially as a feature wall. |
Vertical Stack | Rectangular tiles are stacked vertically instead of horizontally. | Drawing the eye upwards to create the illusion of a higher ceiling. This is ideal for smaller bathrooms. |
For instance, using large-format tiles in a simple grid pattern can make a small bathroom feel more spacious because there are fewer grout lines breaking up the surface. On the other hand, a herringbone pattern can become a stunning focal point behind a basin or in a shower enclosure, adding a bespoke, high-end feel to the space. This planning stage is your chance to get creative and make sure the result perfectly matches your vision.
Laying Your Tiles: Application and Setting
Right, so your walls are prepped and your layout is chalked out. This is where the real magic happens, and your bathroom starts looking like a bathroom. Getting that first tile on the wall can feel like a big moment, but trust me, once you get into a rhythm, it's one of the most satisfying jobs you can do.
The trick is to be methodical. Don't try to tackle the whole wall at once. By working in small, manageable sections, you make sure the adhesive doesn't dry out before the tile is set. This guarantees every single tile gets a rock solid bond that will last for years.
Getting the Adhesive Mix Just Right
For a bathroom, you absolutely want to use a powdered adhesive. It's what the pros use for a reason it offers a much stronger, more water-resistant bond than the ready mixed stuff you get in a tub. The goal is a consistency like thick, smooth custard. It should be stiff enough to hold its shape on your trowel without sliding off.
Here’s a tip: always add the powder to the water, not the other way around. This little trick stops lumps from forming at the bottom of your bucket. Give it a good whizz with a mixing paddle on a drill, then let it sit for 5-10 minutes. This is called 'slaking', and it lets the chemicals in the mix fully activate. After that, one last quick mix, and you're good to go.
This visual breaks down the key steps for applying your perfectly mixed adhesive.

As you can see, it’s all about a careful mix followed by an even application. Those combed ridges are what give your tiles maximum grip.
Spreading the Adhesive on the Wall
Start by scooping a decent amount of adhesive onto your trowel. Apply it to the wall in one of your marked-out sections, beginning just above the timber batten you fixed earlier. Use the flat edge of the trowel to spread it out, aiming for a consistent thickness of around 3-5mm.
Now, flip the trowel over to the notched side. Holding it at a 45 degree angle, comb through the adhesive in straight, horizontal lines. These ridges are absolutely vital. When you press a tile into them, they collapse and create full coverage with a powerful vacuum like grip. Whatever you do, don't create swirls this can trap air behind the tile and weaken the bond.
A critical piece of advice from the field: only spread enough adhesive for an area you can tile within 15-20 minutes. If you touch the adhesive and it's formed a 'skin', it's lost its grab. You'll need to scrape it off and apply a fresh layer.
The boom in home renovations has made tiling a hugely popular DIY project. It's a key reason the UK ceramic tiles market is valued at roughly USD 1.11 billion in 2024. This shows just how much we value tiling for creating durable, beautiful, and water resistant spaces. You can read more about the trends shaping the UK tile market and see why investing in quality materials really pays off.
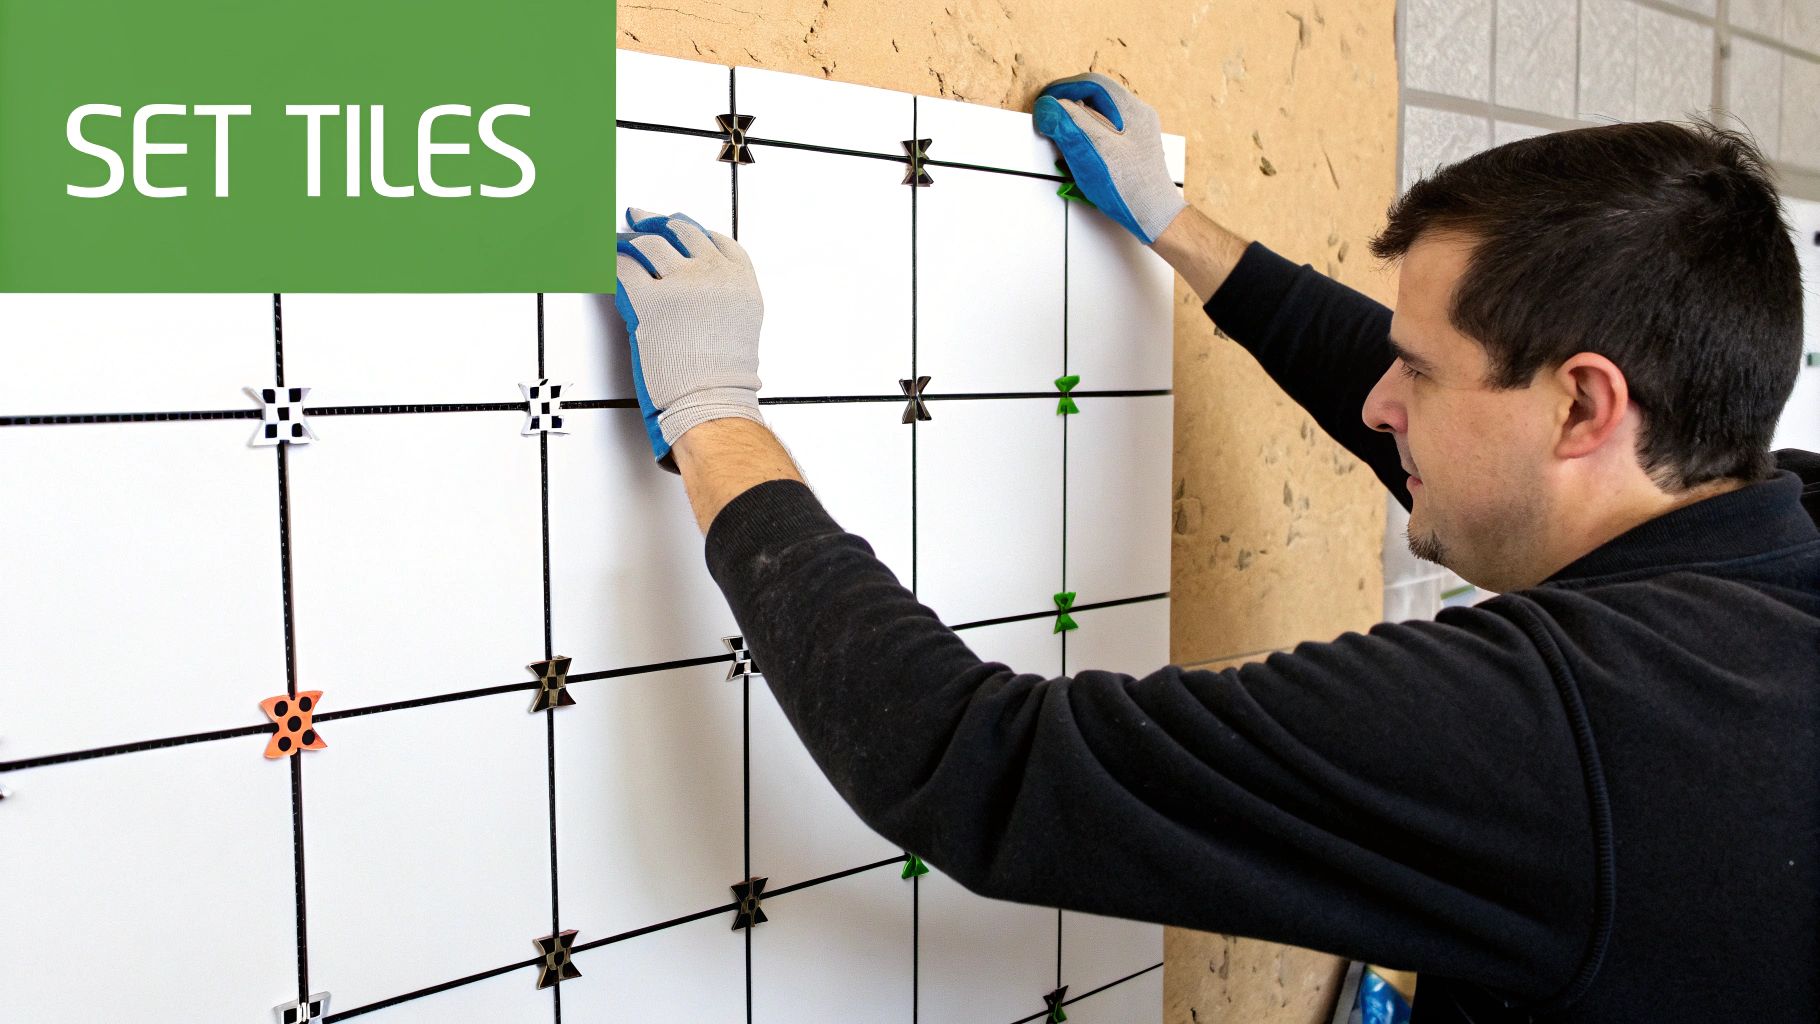
The Art of Setting and Spacing
With your adhesive spread, it's time for the main event. Grab your first tile. Start at your vertical centre line and rest the bottom edge of the tile gently on the timber batten. Press it into the adhesive with firm, even pressure, and give it a slight wiggle. This small movement is key to collapsing those ridges underneath and getting a solid bed.
Once that first tile is in place, position the second one right beside it. Pop tile spacers into the corners and along the edges to maintain a perfect, uniform gap for your grout. These little plastic crosses are the secret to those crisp, professional looking grout lines we all want. Keep working your way along the batten, and get your spirit level out every few tiles to check everything is perfectly flat.
If a tile is sitting a bit proud, give it a gentle tap with a rubber mallet. If it's too deep, carefully lever it off, add a bit more adhesive to the back (a technique we'll cover next), and reset it. Consistency is your best friend here.
When You Absolutely Need to Back Butter
For larger format tiles I’m talking anything over 300x300mm or for heavy materials like natural stone, there's an extra step you shouldn't skip: back buttering. This technique gives you the extra adhesion needed to stop gravity from pulling heavy tiles down over time.
It’s simple. Just use the flat side of your trowel to apply a thin, even layer of adhesive to the back of the tile before you press it onto the combed adhesive on the wall. This 'tile-on-tile' method ensures 100% adhesive coverage, leaving no air pockets and creating the strongest bond possible. It’s a tiny bit of extra work that gives you complete peace of mind, especially in a shower area. Master this, and you’ll have tiles that are secure for years.
Grouting and Sealing for a Professional Look
With your tiles securely on the wall, it’s the finishing touches that truly make the project shine. Grouting and sealing are the final, critical steps that protect all your hard work, giving you a durable, waterproof finish that will look sharp for years. This is where you go from DIYer to pro.
These two processes fill the gaps between your tiles and seal all the vulnerable joints against moisture. Get them right, and you’ll have a bathroom wall that's as tough as it is beautiful. Get them wrong, and you’re looking at discoloured lines, mould, and potential water damage down the line.
The Art of Applying Grout
Grout does more than just fill the gaps; it locks every tile together, creating one solid, unified surface. The first job is picking the right product. Always go for a mould resistant, waterproof grout specifically made for wet areas like bathrooms and kitchens.
Your colour choice can completely change the final look. A grout that matches your tile colour creates a subtle, seamless finish that can make the room feel bigger. On the other hand, a contrasting colour like a dark grey grout with classic white metro tiles makes the tile pattern pop, creating a bold, graphic statement.
Applying it is pretty straightforward. Mix the powdered grout with water until it has a smooth, lump-free consistency, a bit like thick toothpaste. Using a grout float held at a 45 degree angle, press the grout firmly into the joints, working diagonally across the tiles. This diagonal movement is key it stops you from accidentally scooping grout out of the lines you’ve just filled.
Mastering the Grout Cleanup
Cleaning up is all about timing. After applying the grout, you need to wait about 15-30 minutes for it to firm up. You’ll know it’s ready when you can press a finger into it and it doesn’t transfer. This is your window of opportunity.
Using a damp tiling sponge and I mean damp, not soaking wet gently wipe the excess grout off the face of the tiles. Keep a bucket of clean water handy and rinse your sponge often to avoid spreading a hazy film. After a few hours, you might notice a fine dust on the tiles; this is normal and can be easily buffed away with a dry microfibre cloth.
A classic mistake is using far too much water during the cleanup. An overly wet sponge can wash out the pigment from coloured grout, leaving you with a patchy, uneven finish. Worse, it can pull grout right out of the joints, weakening the whole installation.
The demand for beautifully tiled bathrooms is growing across the UK. With more people investing in home improvements, the UK ceramic tiles market is projected to see a compound annual growth rate (CAGR) of 3.60% between 2025 and 2034. This growth is largely driven by residential projects where moisture resistance is paramount. You can dig into the specifics in the full United Kingdom ceramic tiles market report.
Grouting vs Sealing Key Differences
It’s easy to get confused, but grout and silicone sealant do very different jobs. Understanding their roles is crucial for a long-lasting, professional finish when tiling bathroom walls. Grout provides rigidity and fills gaps, while sealant offers a flexible, waterproof barrier in high-movement areas.
This table breaks down the main distinctions:
Aspect | Grout | Silicone Sealant |
|---|---|---|
Primary Function | Fills gaps between tiles, adds rigidity | Creates a flexible, waterproof seal in joints |
Material Base | Cement-based powder mixed with water | Silicone-based paste |
Flexibility | Rigid, prone to cracking with movement | Highly flexible, absorbs movement |
Where to Use | Between all tiles on a flat surface | Corners, junctions, around baths and showers |
Waterproofing | Water-resistant but not fully waterproof | Completely waterproof |
In short, you grout the field of tiles and seal the corners and edges. Using one where the other is needed is a recipe for failure.
The Crucial Role of Silicone Sealant
While grout is water resistant, it isn't flexible or 100% waterproof. For any corners where walls meet, or the junctions around baths and shower trays, you need a flexible barrier. This is where sanitary silicone sealant comes in.
Silicone absorbs the tiny movements that happen in a house, preventing cracks and providing a completely watertight seal. It's a non-negotiable step for stopping leaks and keeping mould at bay. If you want to see the serious problems that moisture penetration can cause, our guide on how much damp proofing costs is an eye-opener.
To get a perfect seal, make sure the joint is spotlessly clean and dry. For a super-straight line, apply masking tape along both sides of the joint, leaving an even gap of about 3-5mm. Squeeze a continuous bead of sealant into the gap, then smooth it with a sealant finishing tool or a wet finger for a neat, concave profile. Peel off the tape immediately, pulling it away from the joint, to reveal a crisp, professional edge.
And that's it. Your new walls are now fully protected and ready to be admired.
Common Tiling Questions Answered
Even the most carefully planned tiling project can throw up a few questions. It’s a normal part of any DIY job, and knowing how to handle these little hurdles before they appear can save a lot of time and stress. This is where you go from simply following steps to making confident, expert decisions on the fly.
Let’s dive into some of the most common queries that come up when people learn how to tile bathroom walls and give you the clear, practical advice you need to troubleshoot like a pro.
Can I Tile Directly Over Existing Bathroom Tiles?
Technically, yes, you can tile over old tiles, but it’s a big "if". This shortcut only works if the existing tiles are absolutely rock-solid, completely secure, and perfectly level. Tap them gently with your knuckles—if you hear any hollow spots or find any cracked or loose tiles, they’ve got to come off.
If everything is solid, you first need to give the old surface a thorough clean to get rid of every last bit of soap scum and grime. After that, I’d strongly recommend sanding the glossy surface to rough it up. This gives the new adhesive a much better key to grab onto.
One crucial point people often forget: tiling over tiles adds extra thickness to your wall. This can mess with the positioning of your bath taps, shower controls, and even stop your bathroom door from closing properly. It’s a small detail that can turn into a massive headache if you overlook it.
What Is the Best Tile for a Small UK Bathroom?
For a typically compact UK bathroom, my go-to recommendation is a large-format tile. The logic is simple: fewer grout lines create a less busy, more seamless look, which really helps to open up the space. Stick with lighter colours like soft grey, off-white, or gentle beiges. They are brilliant at reflecting light, making the room feel brighter and more airy.
Here are a few more tricks for small bathrooms:
Go for Gloss: A glossy finish is your best friend in a small room. It bounces light around beautifully, enhancing that feeling of space.
Lay Them Vertically: If you're using rectangular tiles, installing them vertically draws the eye upwards, giving the illusion of a higher ceiling.
Think Big, Everywhere: Using the same large tiles on both the walls and the floor creates a cohesive, uninterrupted finish that makes the room feel much larger.
How Long Should I Wait Before Grouting Tiles?
Patience is a virtue here, and the real answer lies with your adhesive. Standard-setting adhesives need at least 24 hours to fully cure before you can even think about grouting. If you jump the gun, you’ll trap moisture behind the tiles and seriously compromise the bond.
If you’re working to a tighter schedule, a rapid-setting adhesive is what you need. These can be ready for grouting in as little as 3-4 hours. But always, and I mean always, read and follow the manufacturer's instructions on the bag. Things like room temperature and humidity can tweak those curing times, so don't guess.
Do I Need to Waterproof the Entire Bathroom Wall?
You don't need to waterproof every single wall from top to bottom, but you absolutely must waterproof the critical 'wet zones'. This process, known in the trade as 'tanking', is non-negotiable for building a bathroom that will last.
The essential areas you need to tank are:
All the walls inside a shower enclosure.
The walls immediately around a bathtub, especially one with a shower over it.
Tanking is done by applying a liquid membrane or a matting system directly to the wall before you start tiling. It creates an impenetrable barrier that stops water from ever getting through to the structure of your home. For other splash zones, like behind a basin, a good quality water-resistant grout and sealant will usually do the job, but tanking the main wet areas gives you ultimate peace of mind.
At Hallmoore developments, we understand that a full bathroom renovation is a major undertaking. If you'd prefer to leave it to the experts, our team handles everything from initial design and plastering to plumbing and flawless tiling. Discover our professional bathroom renovation services and let us create the perfect space for you.
Comments